
📑 On this page
Windows 10 end of support 2025 is approaching, and it carries major implications for millions of PC users. After a decade of service, Windows 10 will stop receiving security patches and updates, leaving any remaining users exposed to vulnerabilities. This comprehensive guide will help you navigate the transition. We’ll explain why the end-of-support matters, how to smoothly upgrade to Windows 11, and what to do if your current PC can’t make the jump. By taking action before the Windows 10 end of support 2025 deadline, you’ll keep your computer secure, up-to-date, and running optimally.
Esmond Service Centre has assisted countless customers in Singapore with system upgrades and tech issues, so you can trust the advice here. We draw on insights from Esmond’s certified technicians – in fact, Esmond Service Centre has been recognized by major media like TheSmartLocal and Mothership.sg as one of Singapore’s top tech repair specialists. Our team regularly hears concerns about Windows upgrades, especially as end-of-support nears. With their expertise and 15+ years of IT repair experience, this guide delivers practical steps to help every reader confidently handle the Windows 10 end of support 2025 transition.
Mark the Windows 10 End-of-Support Date and Understand the Risks
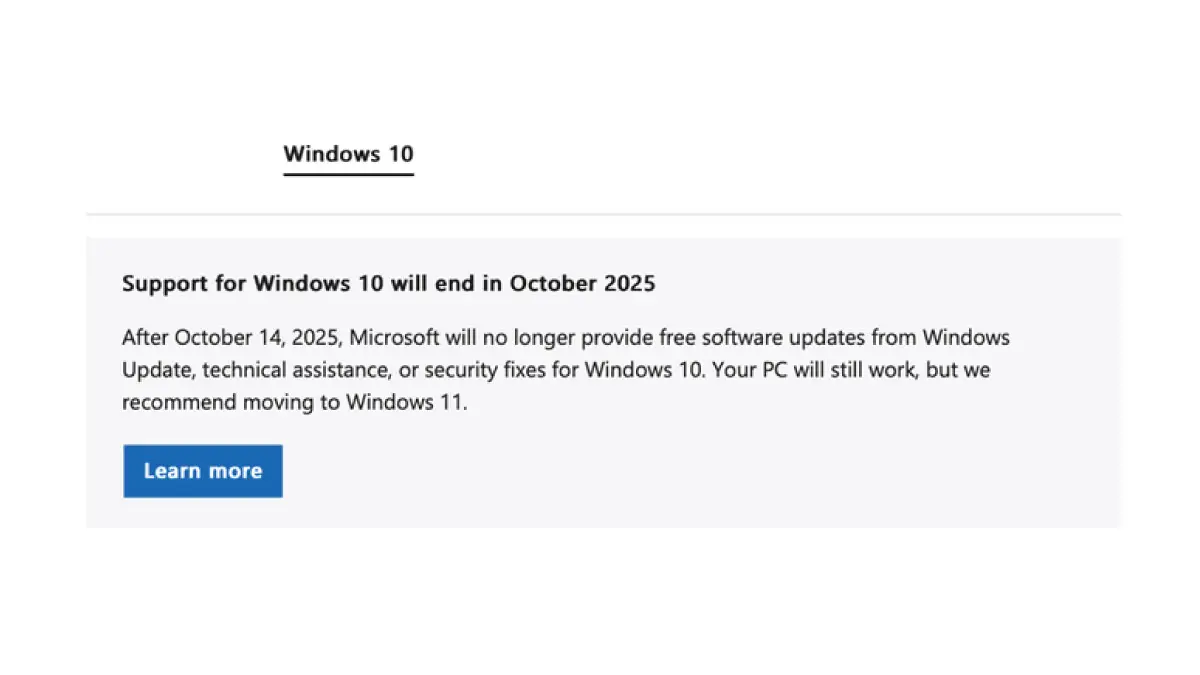
The first step is awareness. Windows 10 end of support 2025 happens on October 14, 2025 – after this date, Microsoft will no longer provide technical assistance, feature updates, or critical security patches. In other words, any PC still on Windows 10 becomes increasingly vulnerable to malware and cyber attacks as new threats emerge. Nearly 60% of Windows users are still running Windows 10 as of early 2025, so if you’re one of them, it’s vital to plan now. Mark the end-of-support date on your calendar and start preparing your upgrade strategy.
Why this matters: Running an unsupported operating system is risky. Without security updates, even well-protected PCs can be exploited by hackers once new vulnerabilities are discovered. You may also miss out on software improvements and compatibility with new apps. Simply put, staying on Windows 10 past its end-of-support means increasing security risks and software limitations. Recognizing the importance of the deadline is the motivation to act promptly.
Solution: Commit to moving off Windows 10 before October 2025. This could mean upgrading your existing PC to Windows 11 or, if necessary, replacing it with a newer device. By planning early, you avoid last-minute stress and ensure your personal data and daily workflow aren’t disrupted. The rest of this guide will walk you through checking your PC, performing backups, and executing the upgrade safely – so you can beat the Windows 10 end of support 2025 deadline with time to spare.
Is My PC Compatible With Windows 11 Before Windows 10 End of Support?
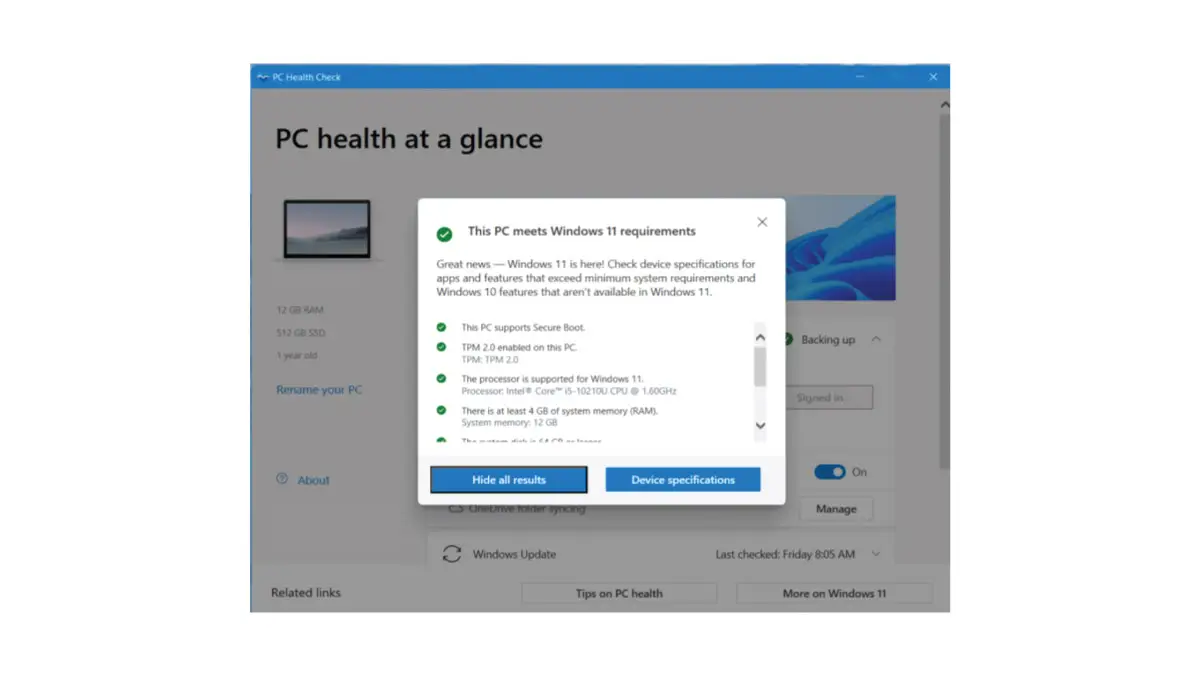
With Windows 10 end of support 2025 looming, upgrading is the ideal path forward, but not every older PC can run Windows 11. Microsoft introduced strict hardware requirements for Windows 11, so you need to verify whether your current machine is eligible. The easiest way is to use Microsoft’s PC Health Check app, which scans your system and reports if it meets Windows 11’s minimum specifications. These include having a modern 64-bit processor, TPM 2.0 security module, UEFI Secure Boot capability, at least 4 GB RAM, and at least 64 GB storage free. Most PCs built in the last 4–5 years will pass, but many older ones may fail due to missing TPM or an unsupported CPU.
How to check compatibility (step-by-step):
- Download and run PC Health Check: Visit Microsoft’s Windows 11 website and download the official PC Health Check tool. Launch the app and click “Check Now”.
- Review the result: The tool will quickly assess your hardware and either show a success message (your PC is compatible) or a failure message. If compatible, you’re clear to upgrade. If not, note the reason it gives (e.g. “Processor not supported” or “TPM not detected”).
- (Optional) Adjust settings if possible: Sometimes a PC fails simply because a feature like TPM or Secure Boot is disabled in BIOS. If your report indicates that, you can reboot into your BIOS settings to enable TPM 2.0 and Secure Boot, then run the check again. This might make an otherwise modern PC pass the requirements.
- Decide on upgrade or replacement: If your PC still doesn’t meet the Windows 11 specs (for example, very old CPU or motherboard with no TPM), you have to decide if you’ll replace the device or consider other options. Microsoft’s official guidance for unsupported devices is to purchase a new Windows 11–ready PC. Continuing to use an incompatible machine past Windows 10 end of support 2025 isn’t safe, so replacing the device is the wise choice if it cannot run Windows 11.
Why this works: Using the PC Health Check ensures you don’t attempt an upgrade on incompatible hardware. It’s a quick diagnostic that saves time and frustration. By identifying any roadblocks now, you can either resolve them (e.g. enable TPM) or plan for a new PC. Upgrading to Windows 11 is only smooth when your system meets the requirements – this step guarantees you know where you stand.
Back Up Your Files and Prepare for the Upgrade
Ahead of the Windows 10 end of support 2025 deadline, it’s crucial to back up your important data. While upgrading from Windows 10 to 11 generally preserves your files and apps (Microsoft designed the process to carry everything over automatically), it’s better to be safe than sorry. Unexpected glitches or user errors could cause data loss if something goes wrong. Preparing a backup and doing some housekeeping will make your Windows 11 transition worry-free.
Steps to prepare:
- Backup important data: Copy your documents, photos, and other vital files to an external hard drive or a cloud service like OneDrive. Windows offers built-in tools as well – for example, you can enable OneDrive PC folder backup to sync your Desktop, Documents, and Pictures to the cloud. Having a recent backup means that even if the upgrade encounters issues, your data remains safe.
- Update Windows 10 and drivers: Ensure your current Windows 10 installation is fully updated (open Settings > Update & Security and install any pending updates). Also, update critical device drivers (graphics, network, etc.) if newer versions are available. A fully patched Windows 10 is less likely to experience upgrade errors.
- Free up disk space: Windows 11 needs adequate disk space for the installation. Microsoft requires at least 64 GB free, though more is better. Delete unnecessary files or use the built-in Disk Cleanup utility to clear temporary files. If your drive is almost full, the upgrade might fail or slow down.
- Temporarily disable antivirus: In some cases, third-party antivirus programs can interfere with OS upgrades. Consider disabling or uninstalling any non-Microsoft security software just during the upgrade process (remember to re-enable it afterward, or rely on Windows Security which is built-in).
- Prepare login info: Make sure you know your Microsoft account credentials, since Windows 11 Home requires signing in with a Microsoft account during setup. If you currently use a local account on Windows 10, be ready to create or use a Microsoft account for the upgrade.
Why this works: Backing up and cleaning up beforehand ensures that nothing important is lost and that the upgrade has the best environment to succeed. A backup is your safety net (even though upgrades usually keep files intact). Updating Windows 10 first can fix known issues and improve compatibility with the new OS. Free disk space gives the installer room to work, preventing aborted installations due to low space. These preparations collectively lead to a smoother, faster upgrade with minimal downtime and hassle. And with Windows 10 end of support 2025 fast approaching, these preparations set you up for a smooth upgrade when it counts.
Perform the Windows 11 Upgrade
With compatibility confirmed and backups in place, you’re ready to actually install Windows 11. There are two primary ways to upgrade from Windows 10:
- Windows Update (recommended): If your PC is eligible, the upgrade to Windows 11 is delivered via Windows Update like a regular update. This is the simplest method.
- Windows 11 Installation Assistant: If Windows Update isn’t showing the upgrade (or if you prefer manual control), you can download Microsoft’s Installation Assistant tool to initiate the upgrade.
For compatible PCs, simply go to Settings > Update & Security and click “Check for updates” – a prompt to “Download and install Windows 11” will appear when available. Upgrading through Windows Update preserves your files and applications seamlessly.
Upgrading via Windows Update: Microsoft has been rolling out the Windows 11 upgrade to Windows 10 users for free. Go to Settings > Update & Security > Windows Update and click “Check for updates.” If your device meets all requirements, you should see an option to upgrade to Windows 11 (it might say “Upgrade to Windows 11 is ready – and it’s free”). When you see this, click the Download and Install button and follow the prompts. The system will download ~4–5 GB of data, then prompt for a restart to begin installation. Leave your PC on and plugged in during the process, as it may take 20–30 minutes or more and involve several reboots. When finished, you’ll be taken to the Windows 11 desktop. (Tip: Upgrading early—well before the Windows 10 end of support 2025 cutoff—ensures your PC stays supported and secure.)
Upgrading via Installation Assistant: If Windows Update doesn’t offer the upgrade (perhaps due to a phased rollout), you can use Microsoft’s official Installation Assistant. Download it from Microsoft’s website and run the tool – it performs the same in-place upgrade process. The Assistant will check your PC’s compatibility again, then download Windows 11 and install it. Follow the on-screen steps (agree to license terms, etc.) and let it run. This method also keeps your files and apps intact. It’s a good alternative if you want to upgrade immediately without waiting for Windows Update to push it to you.
Why this works: Using Microsoft’s provided upgrade paths ensures a supported, legitimate installation of Windows 11. The in-place upgrade process is designed to transition you to the new OS with minimal effort on your part – no need to manually reinstall anything. By upgrading now (well before the Windows 10 end of support 2025 date), you guarantee that your PC continues to receive updates and remains secure. Both Windows Update and the Installation Assistant are straightforward; they automate the complex parts so you can simply follow the prompts. The result is that you’ll be on Windows 11 with all your data preserved, and you won’t have to worry about the looming end-of-support at all.
Post-Upgrade Tips and Getting Professional Help if Needed
Congratulations – if everything went well, your PC should now be running Windows 11, well ahead of the Windows 10 end of support 2025 deadline! After the upgrade, there are a few final things to do to ensure you’re getting the best experience:
- Familiarize yourself with Windows 11: Take a tour of the new interface. The Start menu and taskbar are centered by default (you can move them to the left if you prefer). Explore the new Settings app, Microsoft Store, and features like Snap Layouts for window organization. Windows 11 still works similarly to Windows 10 in most ways, so you’ll get comfortable quickly.
- Check for updates on Windows 11: After installation, go to Settings > Windows Update again and download any post-upgrade patches or driver updates. Microsoft frequently releases fixes, and hardware makers might have new drivers optimized for Windows 11 – installing these will polish any rough edges from the upgrade (especially important with the Windows 10 end of support 2025 deadline approaching).
- Verify your apps and devices: Ensure all your important applications are running fine on Windows 11. Nearly all programs that worked on Windows 10 will work on Windows 11, but if you encounter an issue, check the software publisher’s site for a Windows 11–compatible version. Also test peripherals (printer, webcam, etc.) – if something isn’t recognized, reinstalling the device driver can solve it.
- Restore disabled software: If you removed or turned off any antivirus or special tools before upgrading, now is the time to reinstall or re-enable them. Windows 11’s built-in Windows Security likely took over if no other antivirus was present, so you are protected either way. Reapply any settings as needed.
When to seek help: If at any point you feel overwhelmed – say the PC Health Check showed incompatibility and you’re unsure what new PC to buy, or you ran into errors during the upgrade – it’s wise to consult professionals. Upgrading hardware or dealing with technical hiccups can be complex. Esmond Service Centre offers support for such cases, from advising on Windows 11–ready hardware to performing data migration. Remember, the goal is to stay protected after Windows 10 end of support 2025, and there’s no shame in getting expert assistance to make that happen. It’s far better to ask for help than to risk running an outdated, unsafe system. With Windows 10 end of support 2025 so close, it’s far better to seek help than risk staying on an outdated, unsafe OS.
Why this works: Following post-upgrade best practices ensures you truly reap the benefits of Windows 11. Checking for updates and drivers fine-tunes your system’s stability and performance. Verifying apps and devices catches any compatibility issues early so they can be resolved, keeping your workflow uninterrupted. And knowing when to get help means you won’t stay stuck if a problem arises. Professionals like the team at Esmond Service Centre can quickly resolve upgrade snags or even handle the entire process for you if needed. In the end, you’ll be fully moved on from Windows 10, equipped with a secure system and expert support if anything goes wrong.
Upgrade Now for a Safer, Smoother PC Experience
In summary, to avoid security risks once Windows 10 support ends, plan your move now. Mark the Windows 10 end of support 2025 date (October 14, 2025) and be proactive: check if your PC meets Windows 11’s requirements, back up your files, and perform the upgrade via official methods. This proactive approach ensures you won’t be caught off-guard by Windows 10’s retirement, and you’ll immediately benefit from Windows 11’s improved security and new features.
We hope this guide made the transition less daunting. The key is not to procrastinate – upgrading sooner keeps you protected and productive. Have you upgraded to Windows 11 yet, or are you planning to do so before the deadline? Do share your experiences or questions – we’d love to hear from you. Staying informed and helping each other will make this big tech change easier for everyone.
Stay Tech-Savvy with Esmond Service Centre
Enjoyed this comprehensive Windows upgrade guide? Follow our FaceBook page, Linkedin profile or Instagram account for more expert insights and practical tips on cutting-edge technology. We regularly share updates to help you get the most from your devices. If you have any specific questions about upgrading Windows or want professional assistance, don’t hesitate to contact Esmond Service Centre – we’re always here to help you make the best tech decisions and keep your technology running smoothly.
Esmond Service Centre's experienced technicians can diagnose and fix it fast — free diagnostics, repairs from $65.